DIY Sauna build with an off-grid wood stove
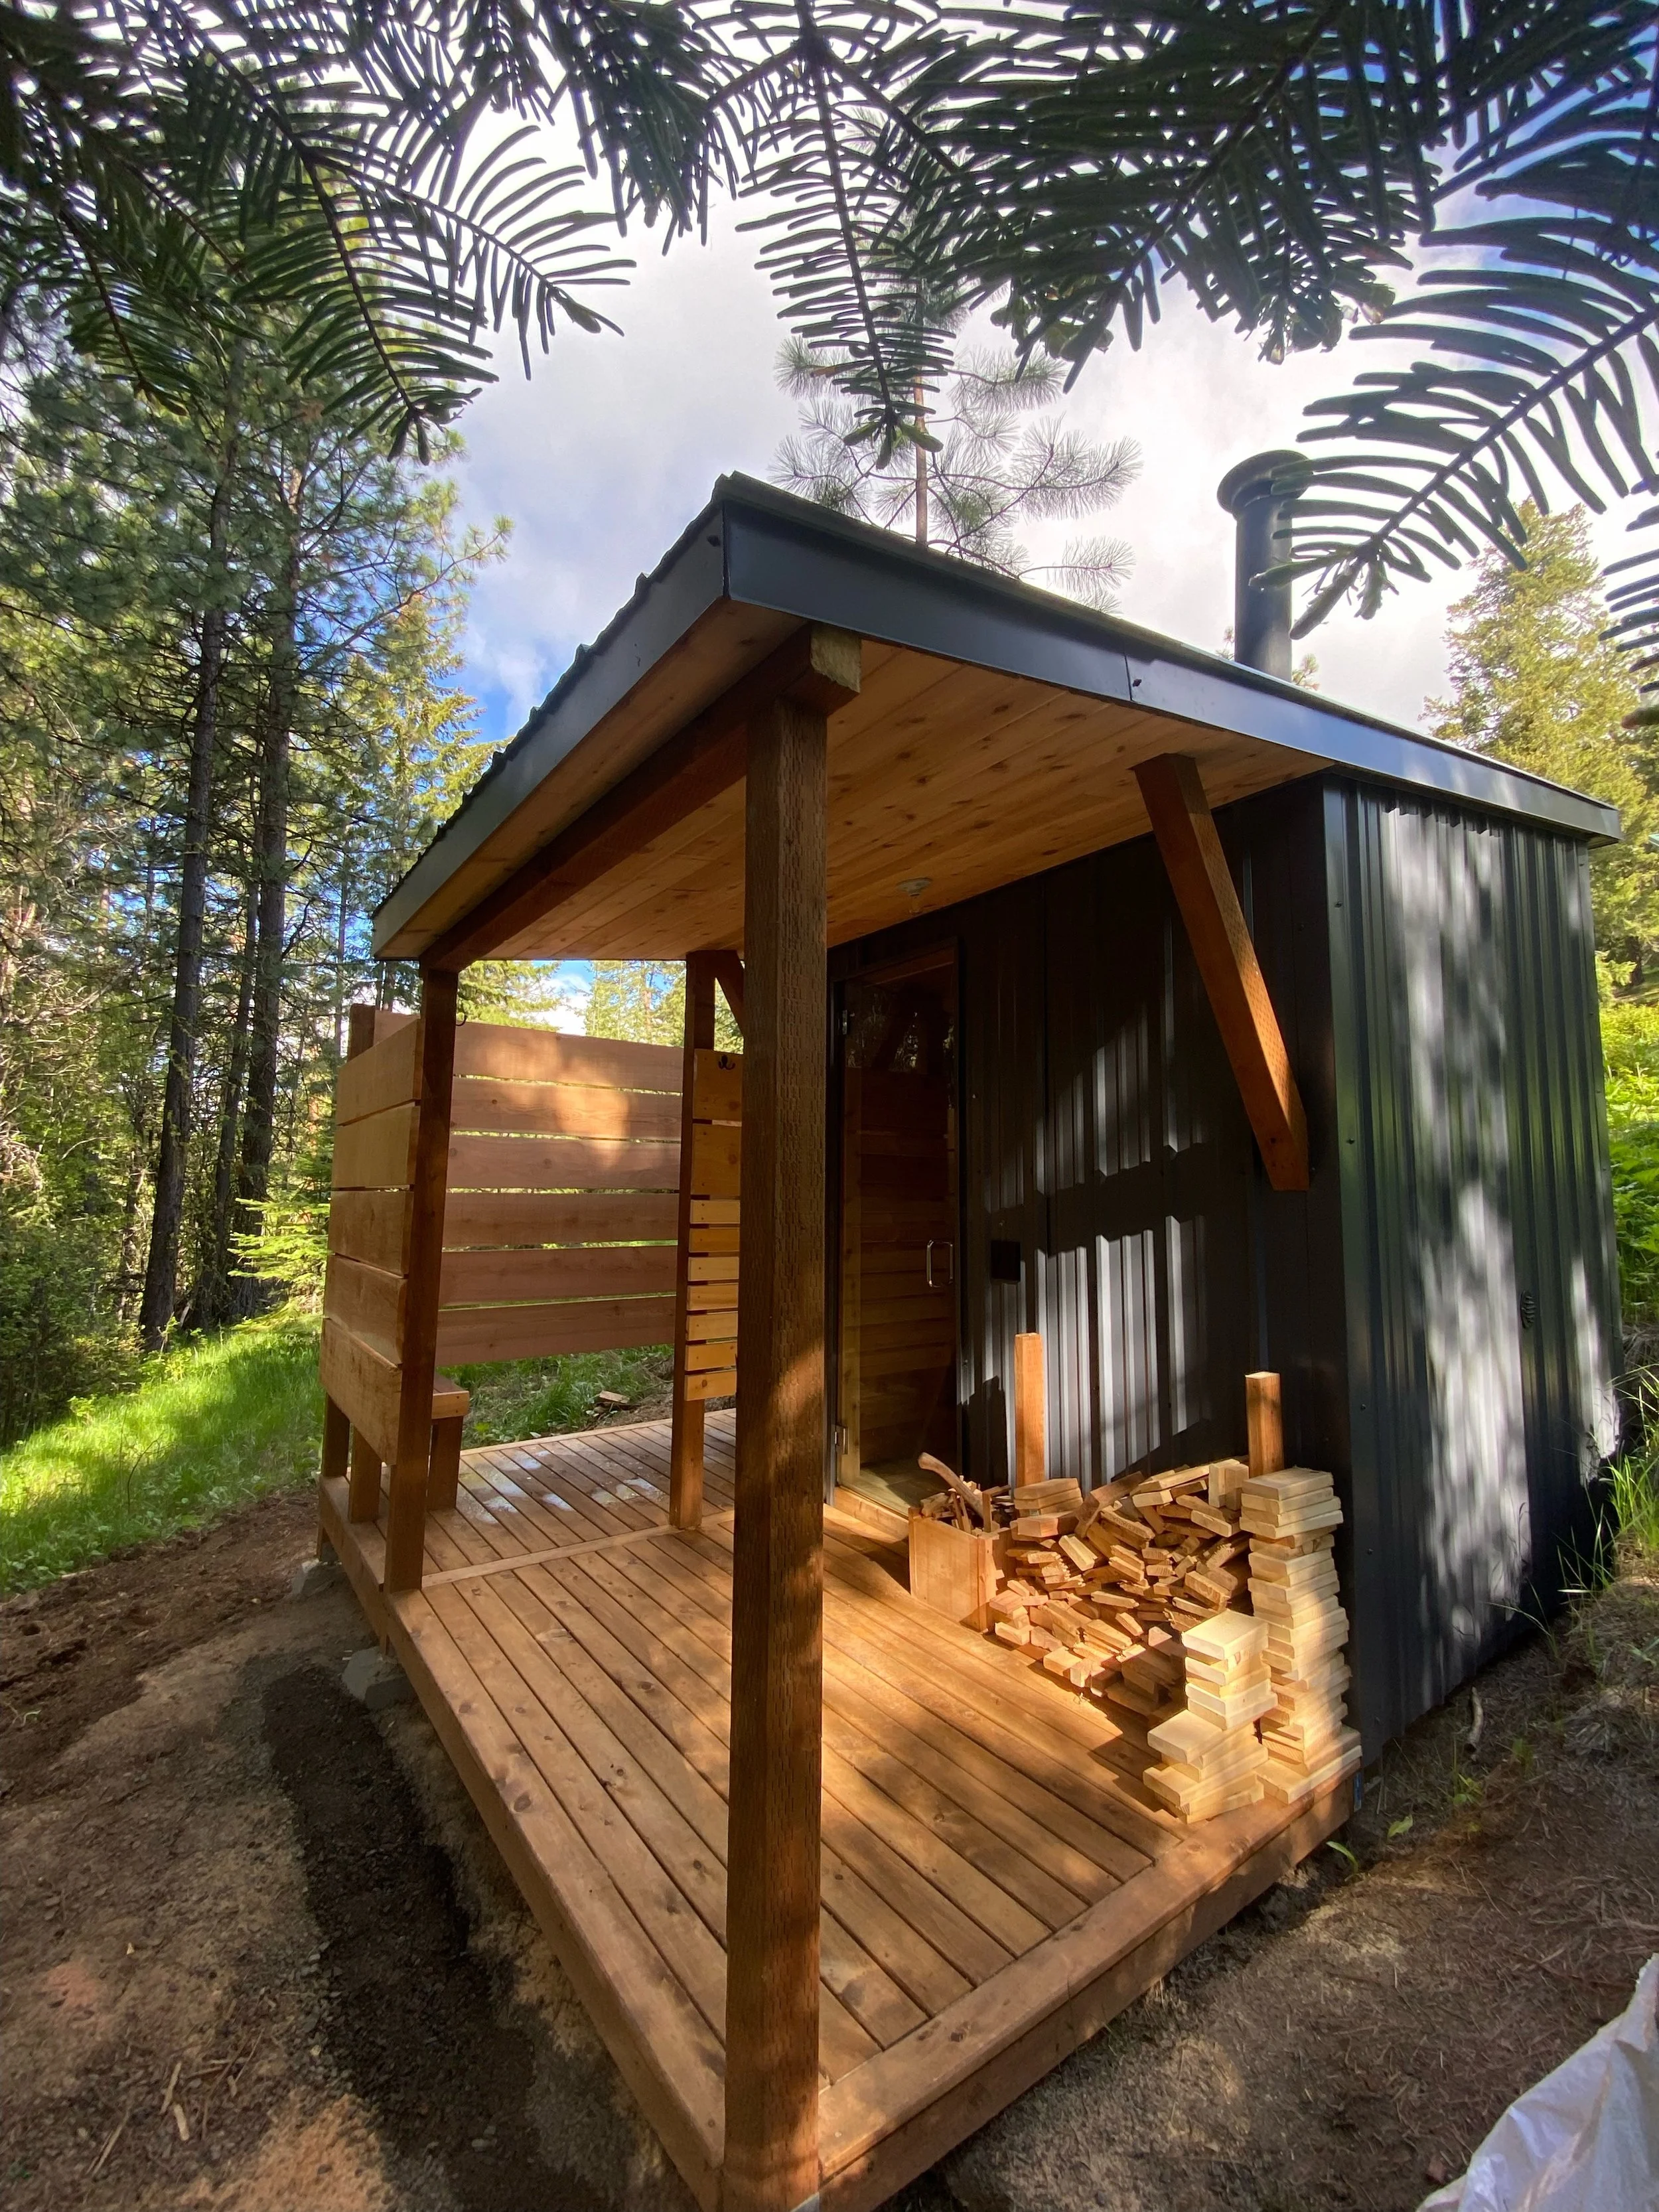
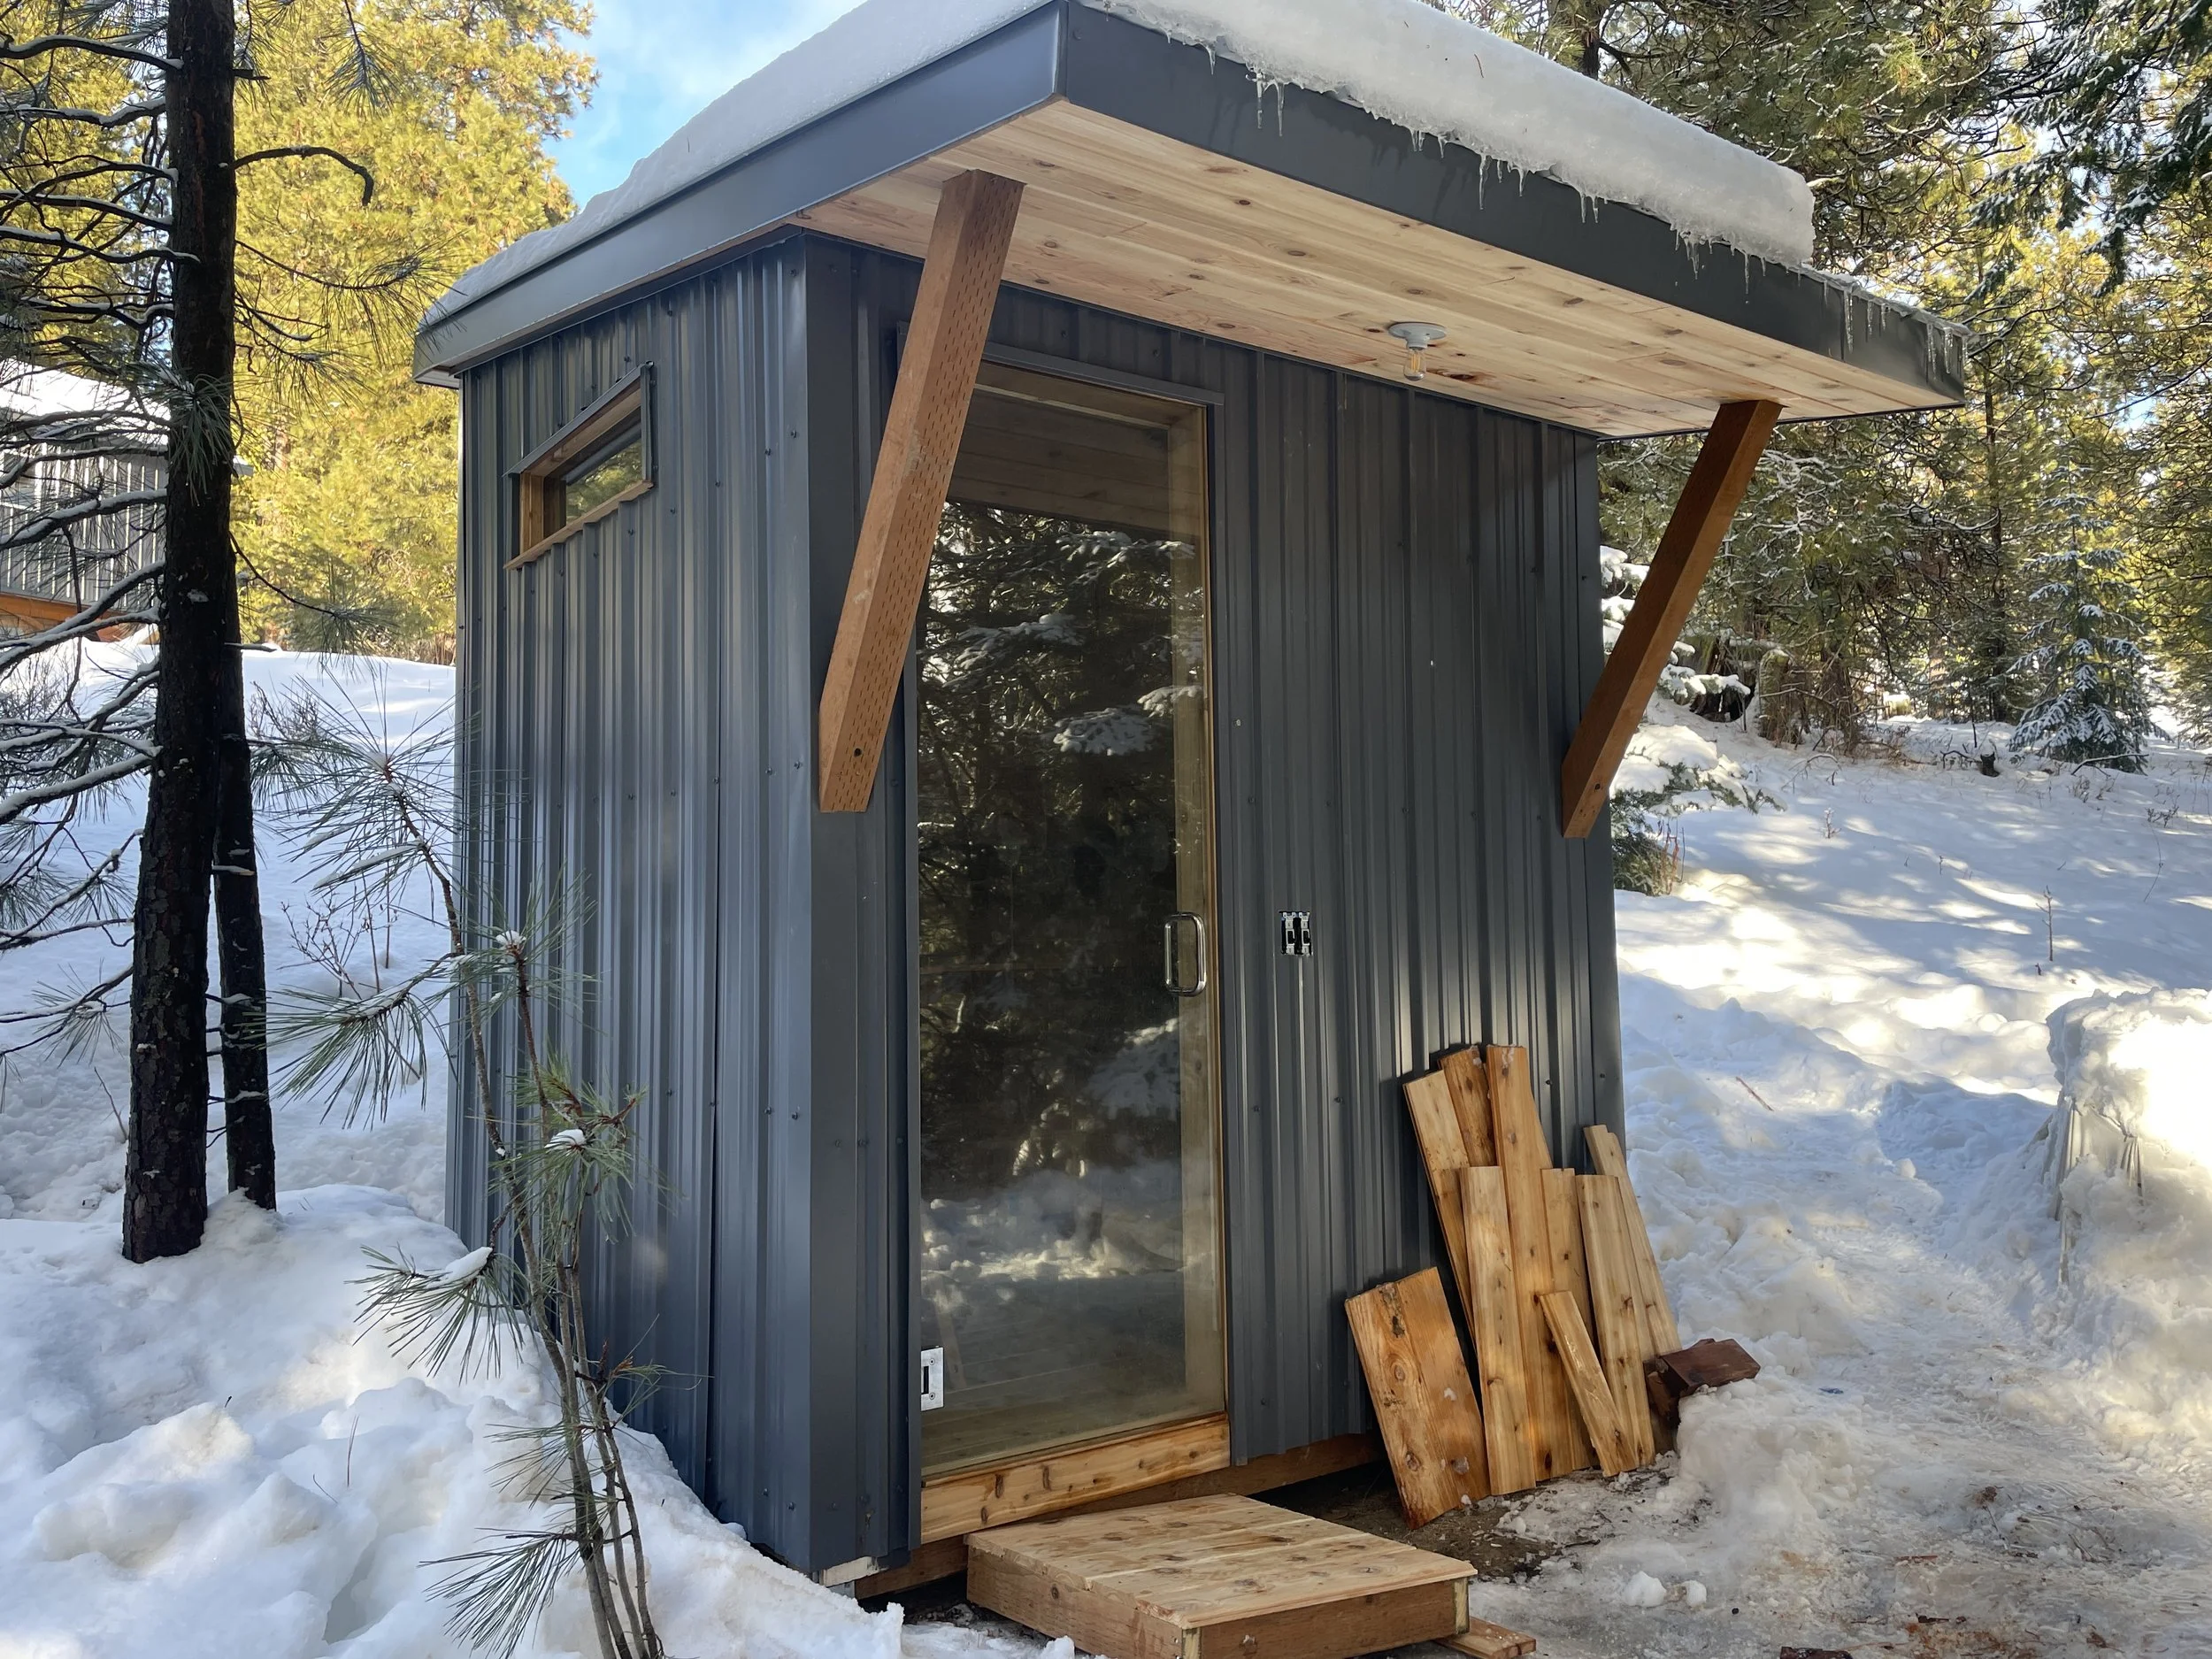
Our first sauna build is a little bit different than the plans listed here, but taught a lot of lessons that carry over. It’s located at some off-grid property in the mountains of Washington State, which also brought its own unique challenges and opportunities, as well as different needs. All said and done, it’s pretty, blending in nicely with the forest landscape, and it performs exceptionally well, easily reaching over 200 degrees.
The total cost and materials list for this DIY sauna are pretty comparable to what we’ve put together to help you with your own build.
Here are some process pictures and notes from the build.
The design and site
The entire lot is on a gentle slope, which meant either digging on the uphill side of the sauna or elevating the downhill side. This got the wheels turning and the ideas flowing for some unique designs — the first idea was to really dig it deep into the ground, so that the roof was the only part showing. No excavator and a very hard layer of clay meant that it was only dug slightly back into the hill.
With this original design idea, it was going to be constructed more like a post-framed building with posts and girts or purlins (and a natural floor of river rock) rather than sheathing. Due to moisture concerns, this plan was abandoned in favor of the traditional stick framing you see in the plans. But, this is the reason it’s not traditional, sheathed with OSB, like a regular shed or building.
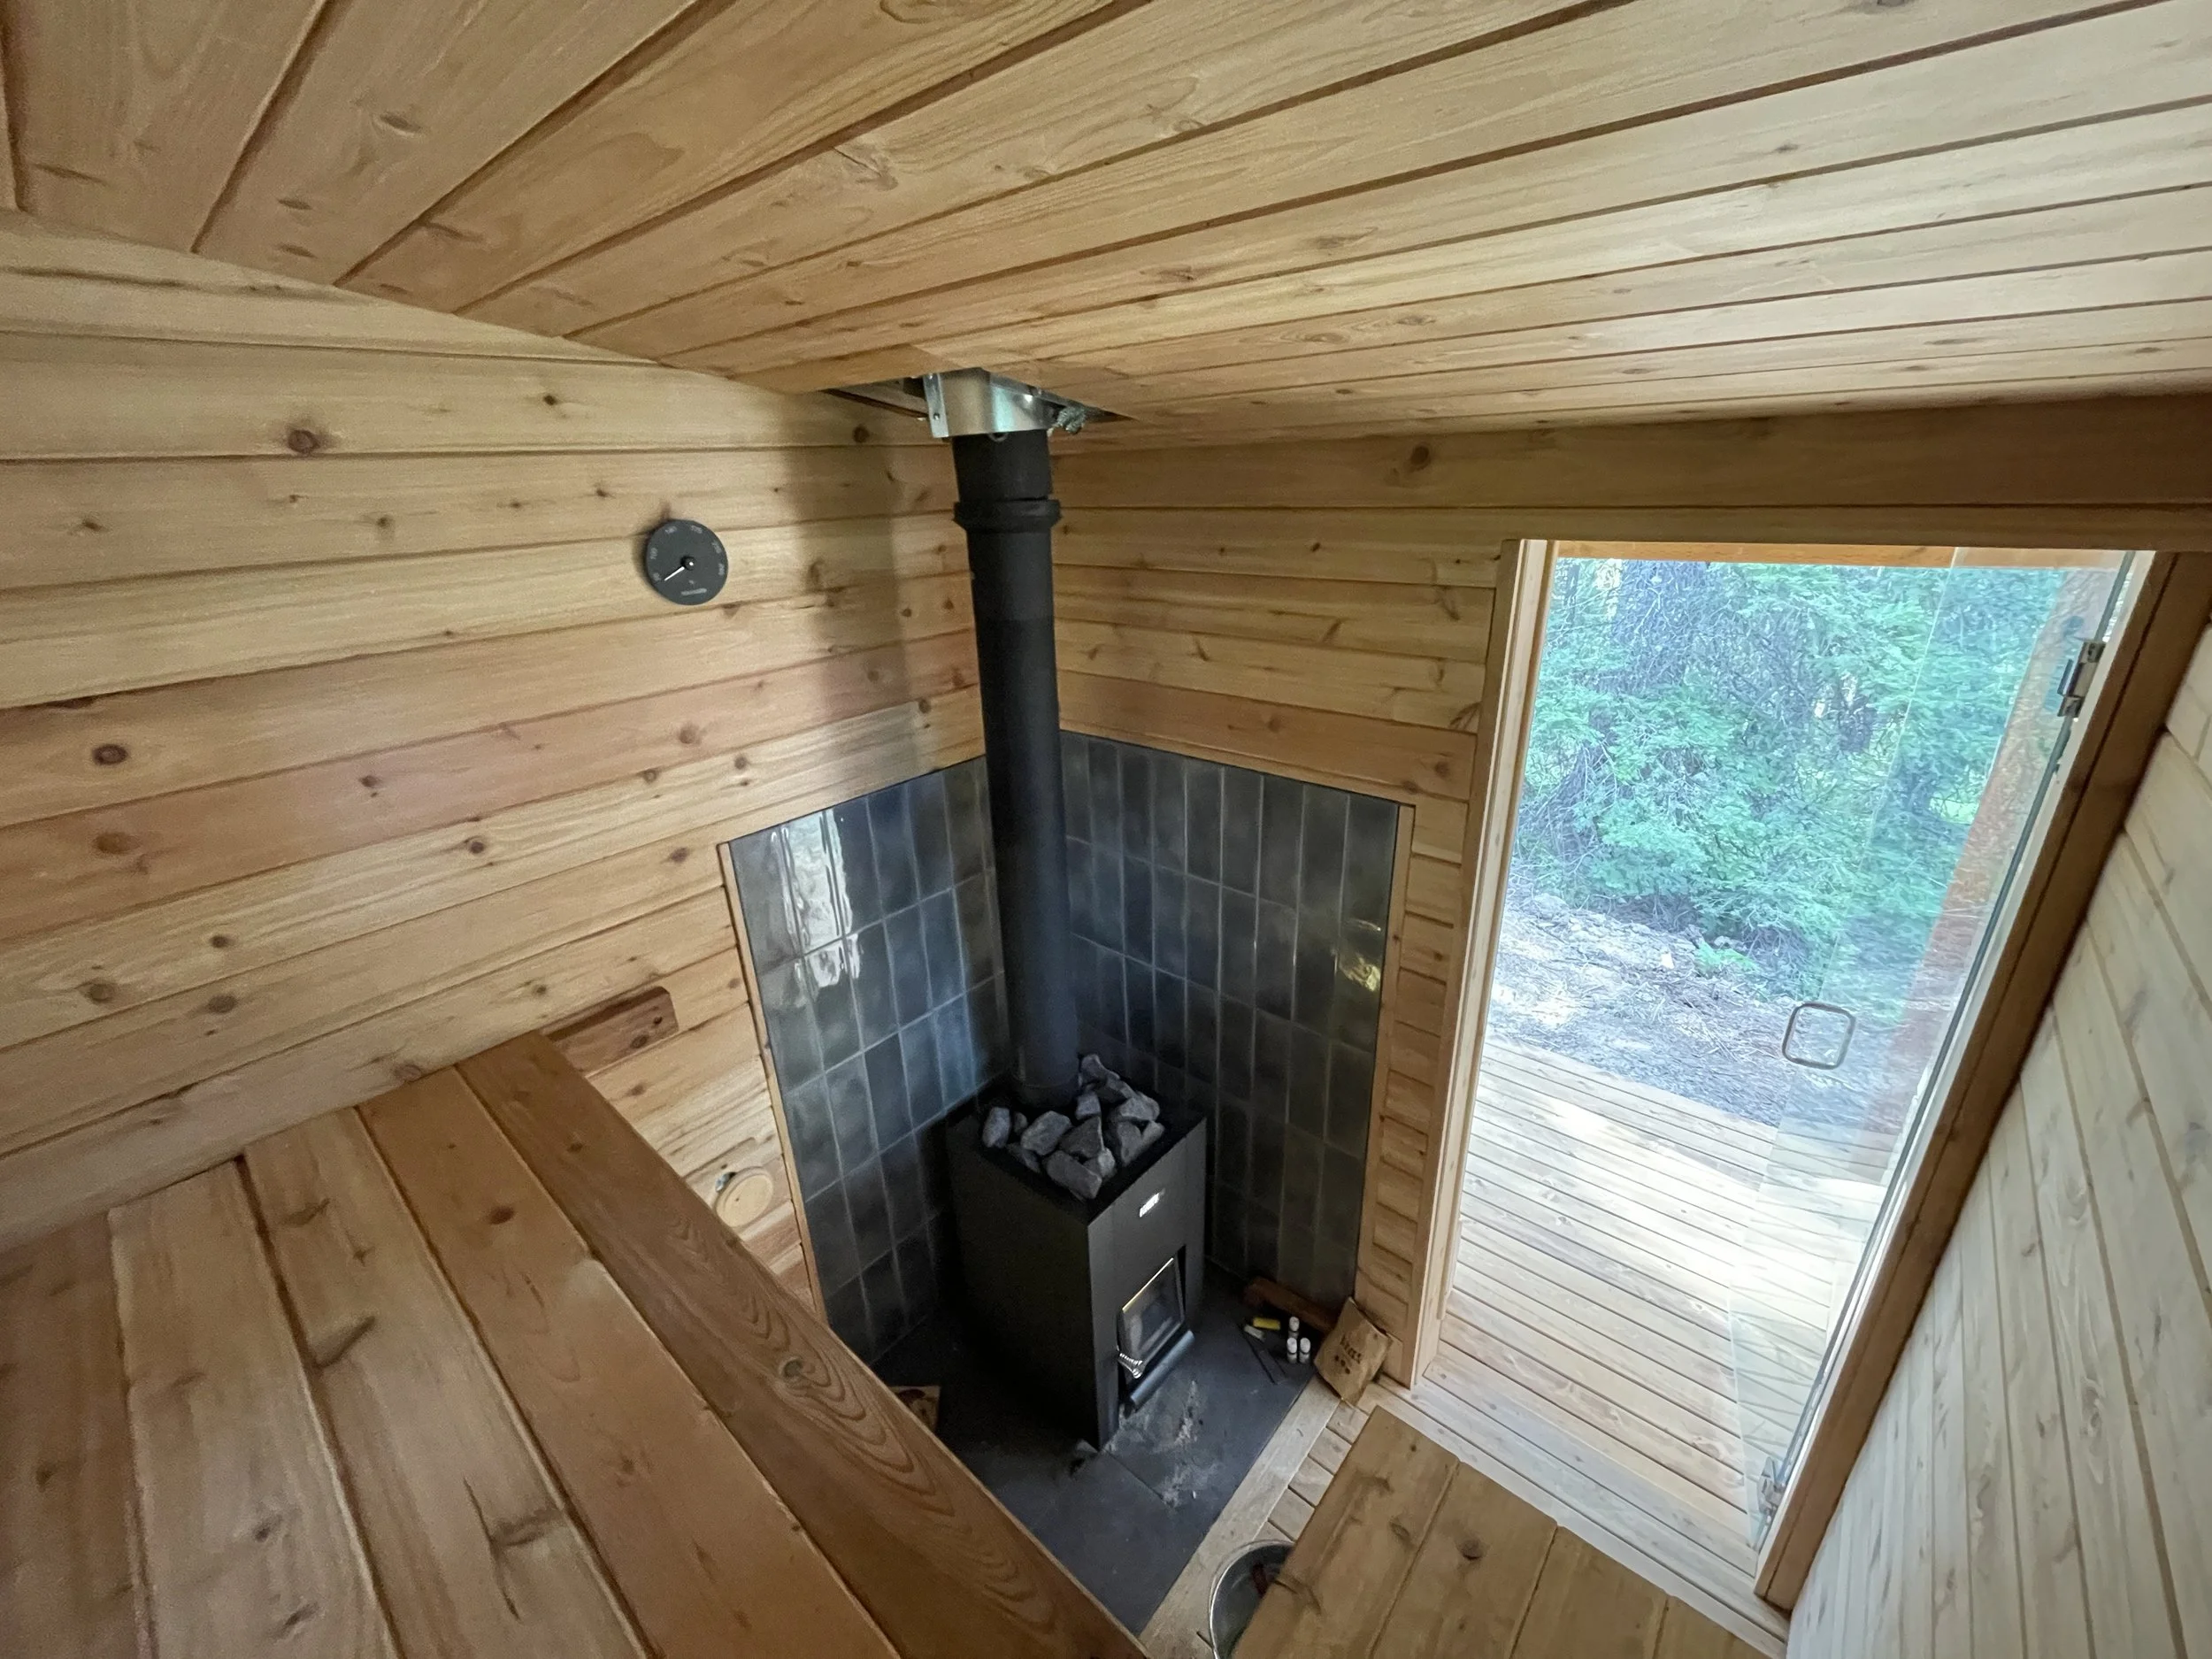
The hill did allow for one critical design element, however, a sloped interior roof with the benches on the taller side and the door on the lower side. It’s quite difficult to design a sauna that achieves this layout, which is needed for proper air and loyly circulation. For this reason, the plans here use a flat ceiling.
With limited water and power, concrete is not so fun to pour, so the foundation is a cobbled-together combination of deep holes, lots of gravel, and concrete “deck blocks.” It feels pretty very solid and forewent a lot of toil and expense.
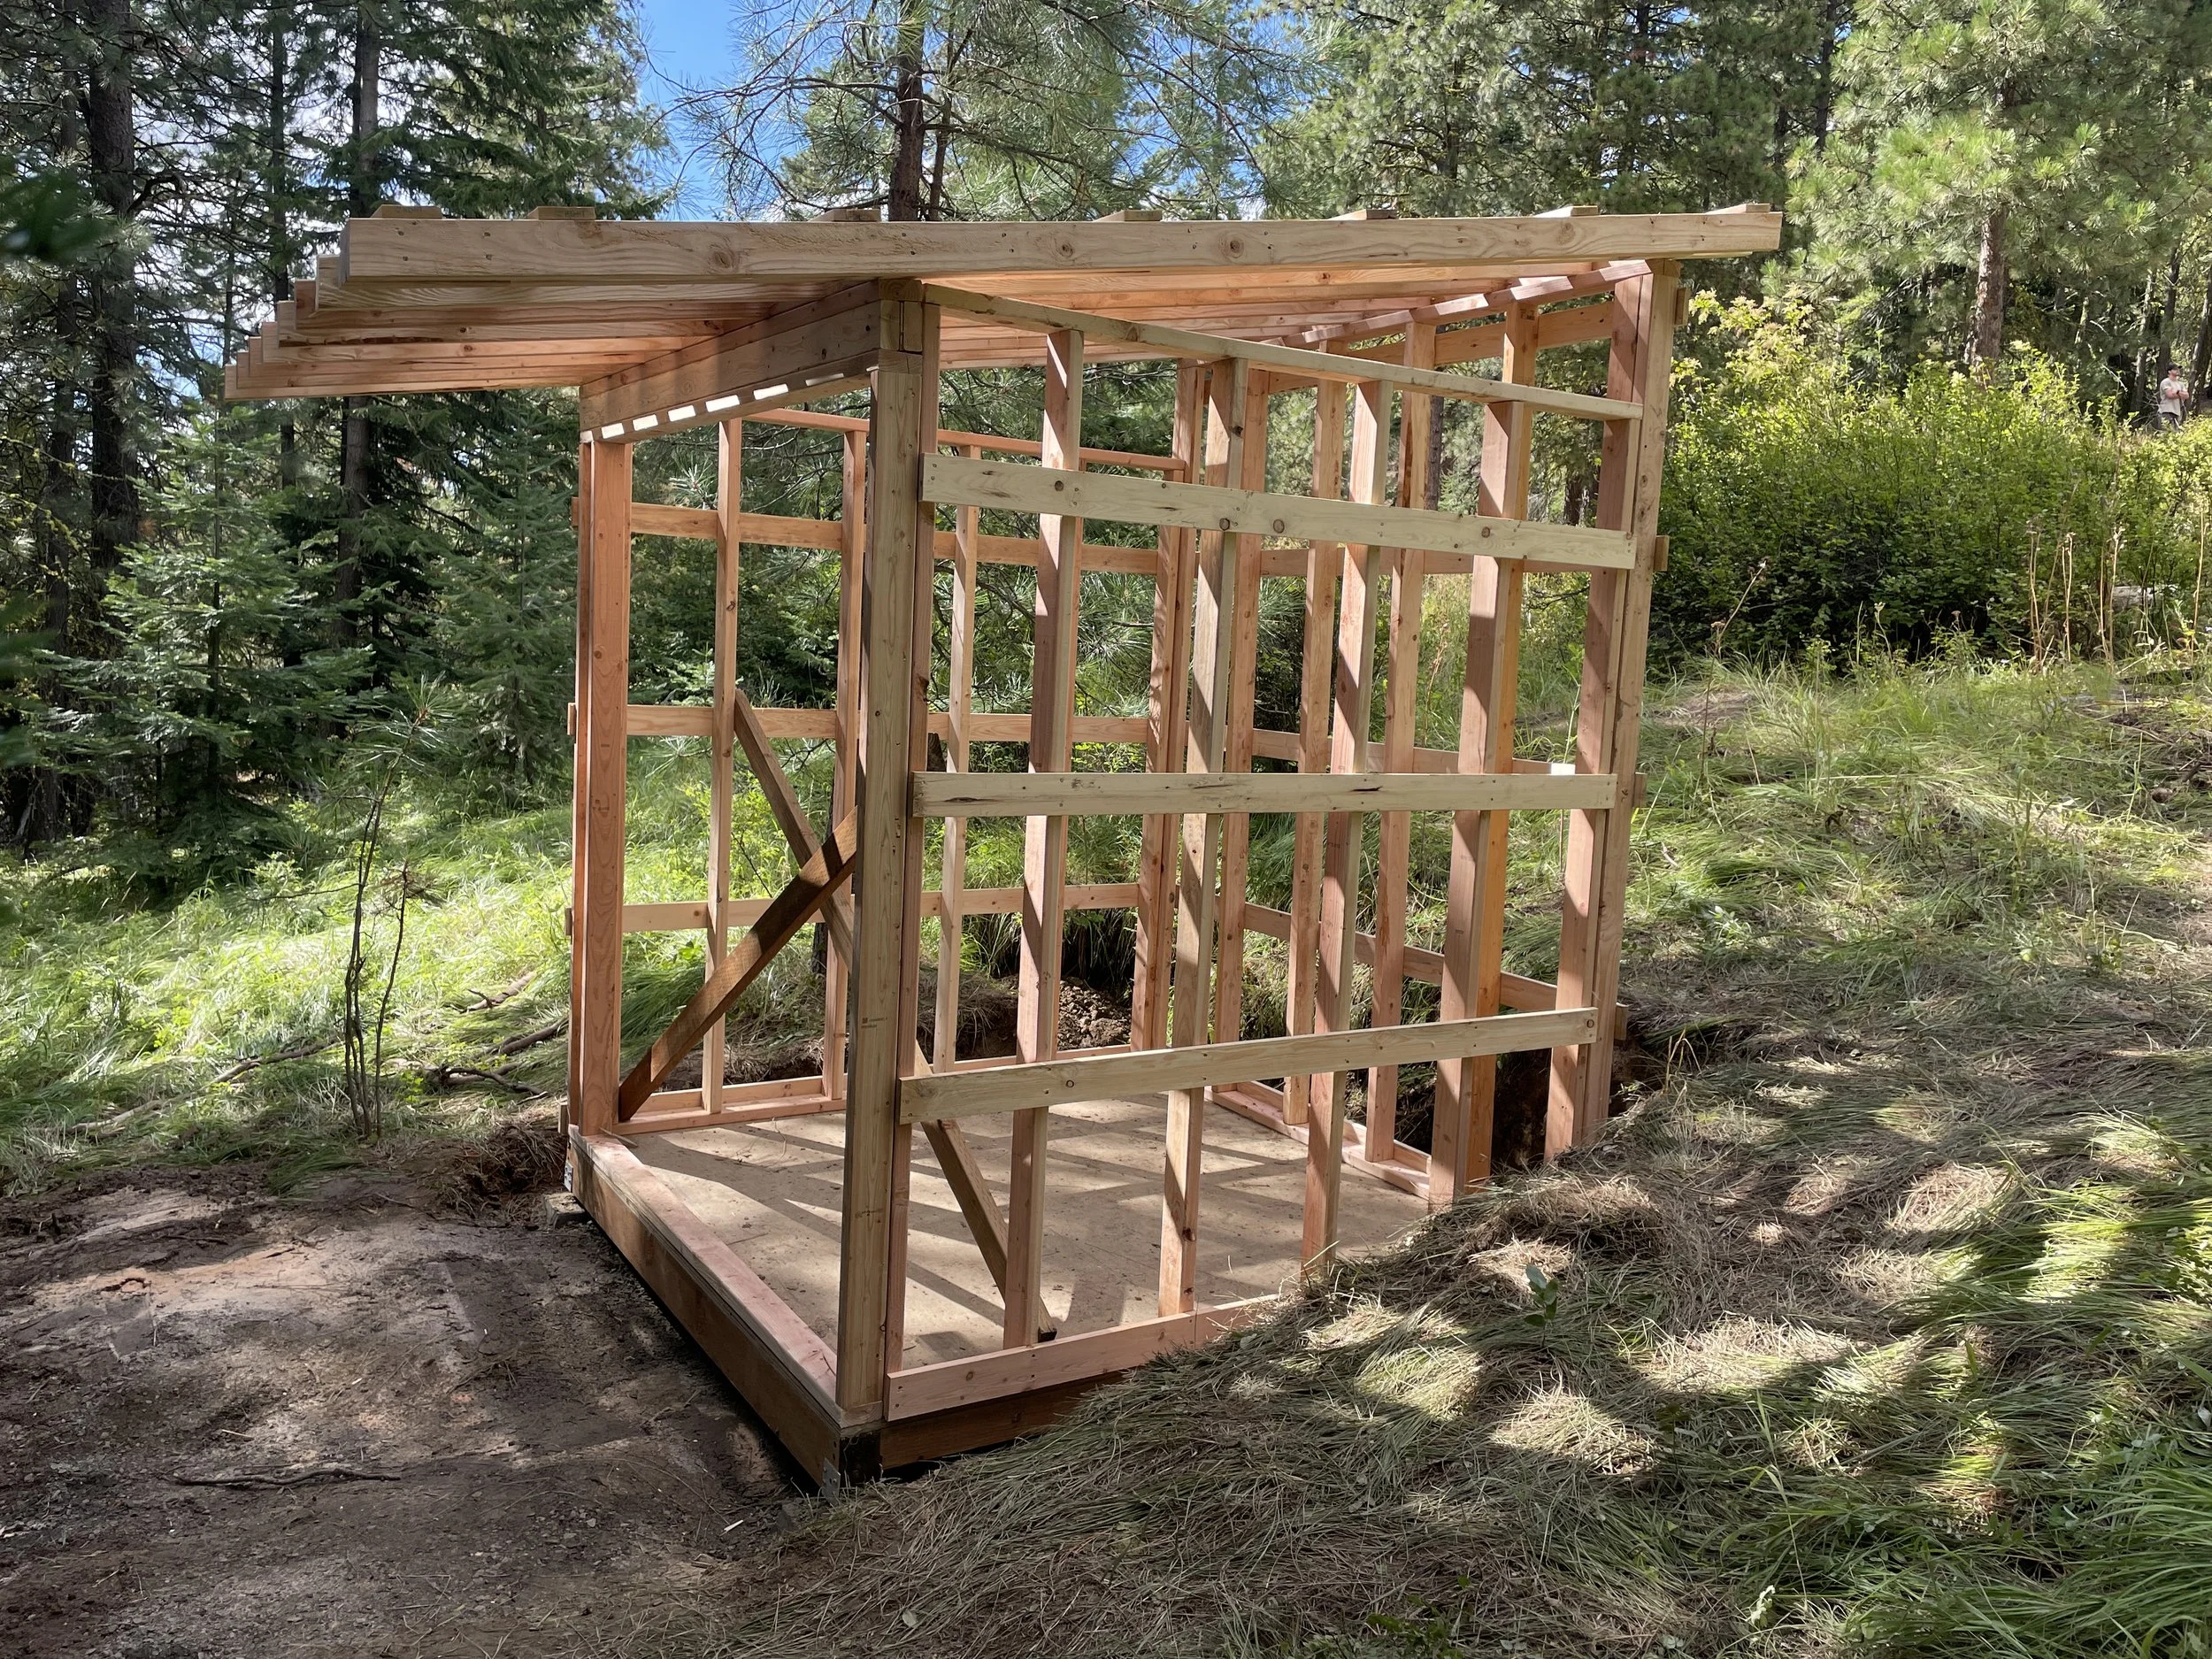
Framing & construction
Everything went pretty smoothly, framing and getting the bones together. Except for one of the walls… We marked the stud layout on the top and bottom plates, then somehow one of them got flipped, mismatching the layout — this was not noticed until it was way too late. Alas, it's for personal use, not a client, and the outcome is fine, so no one will ever know, unless you read this.
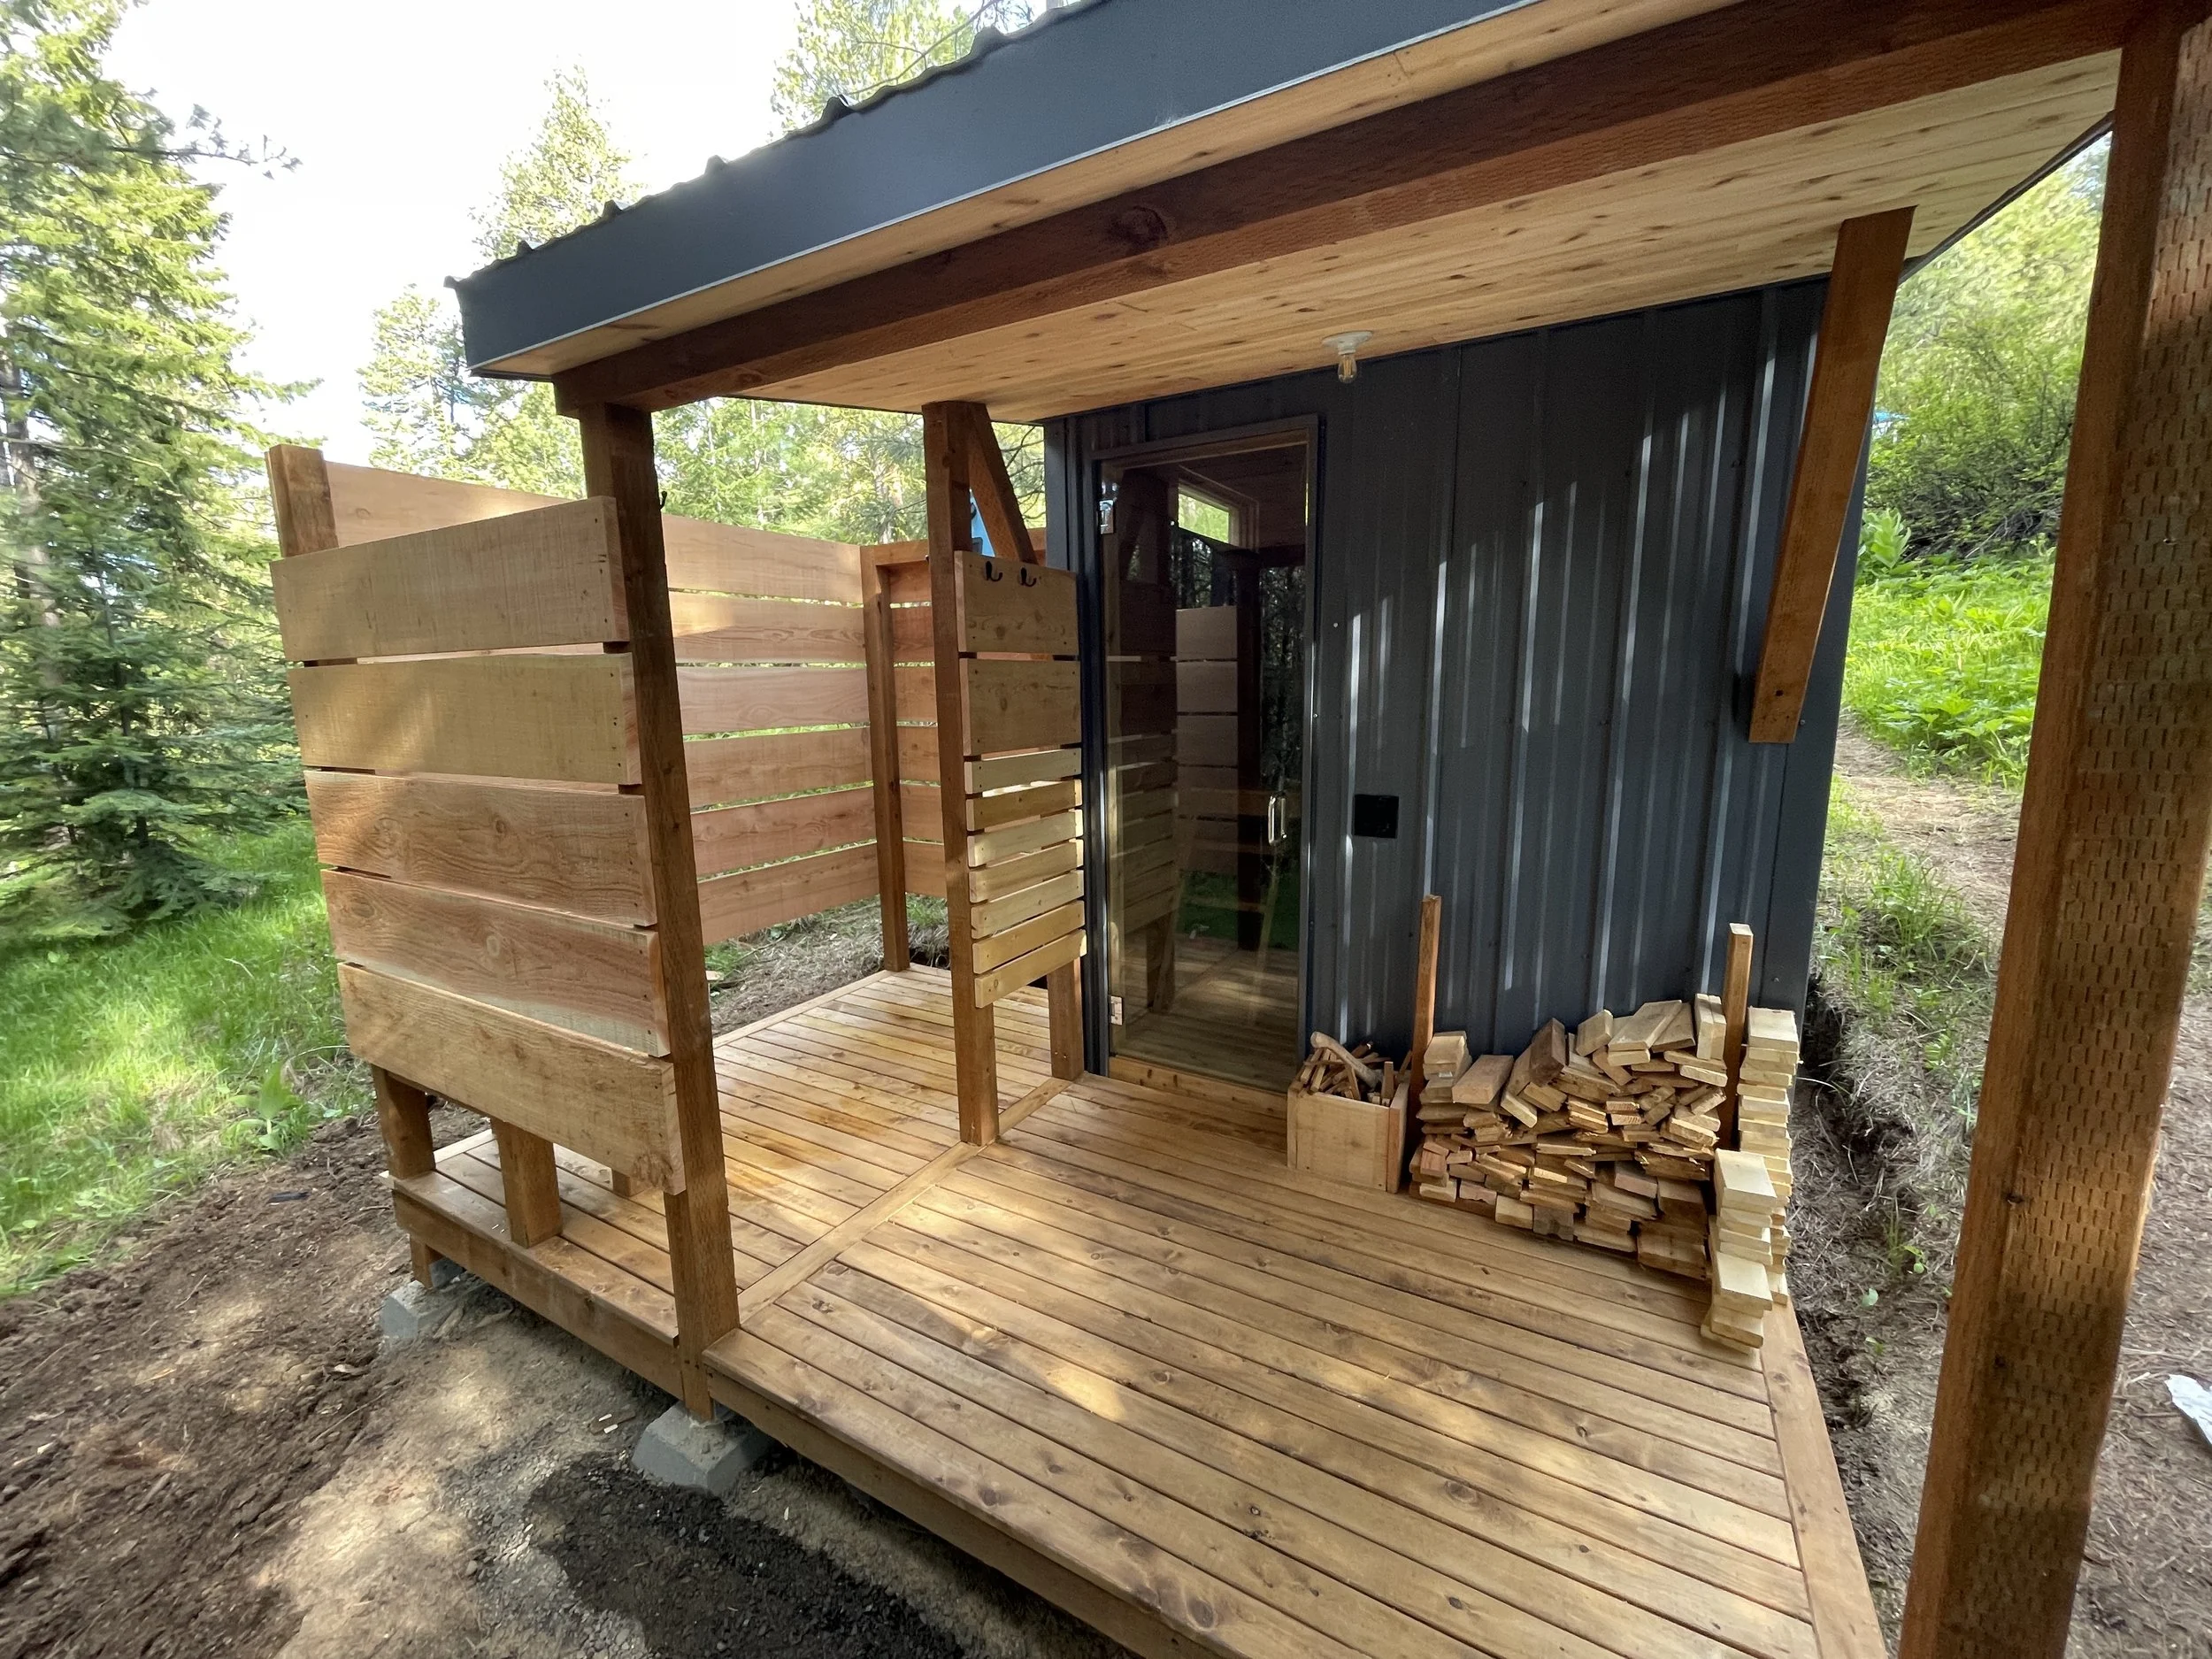
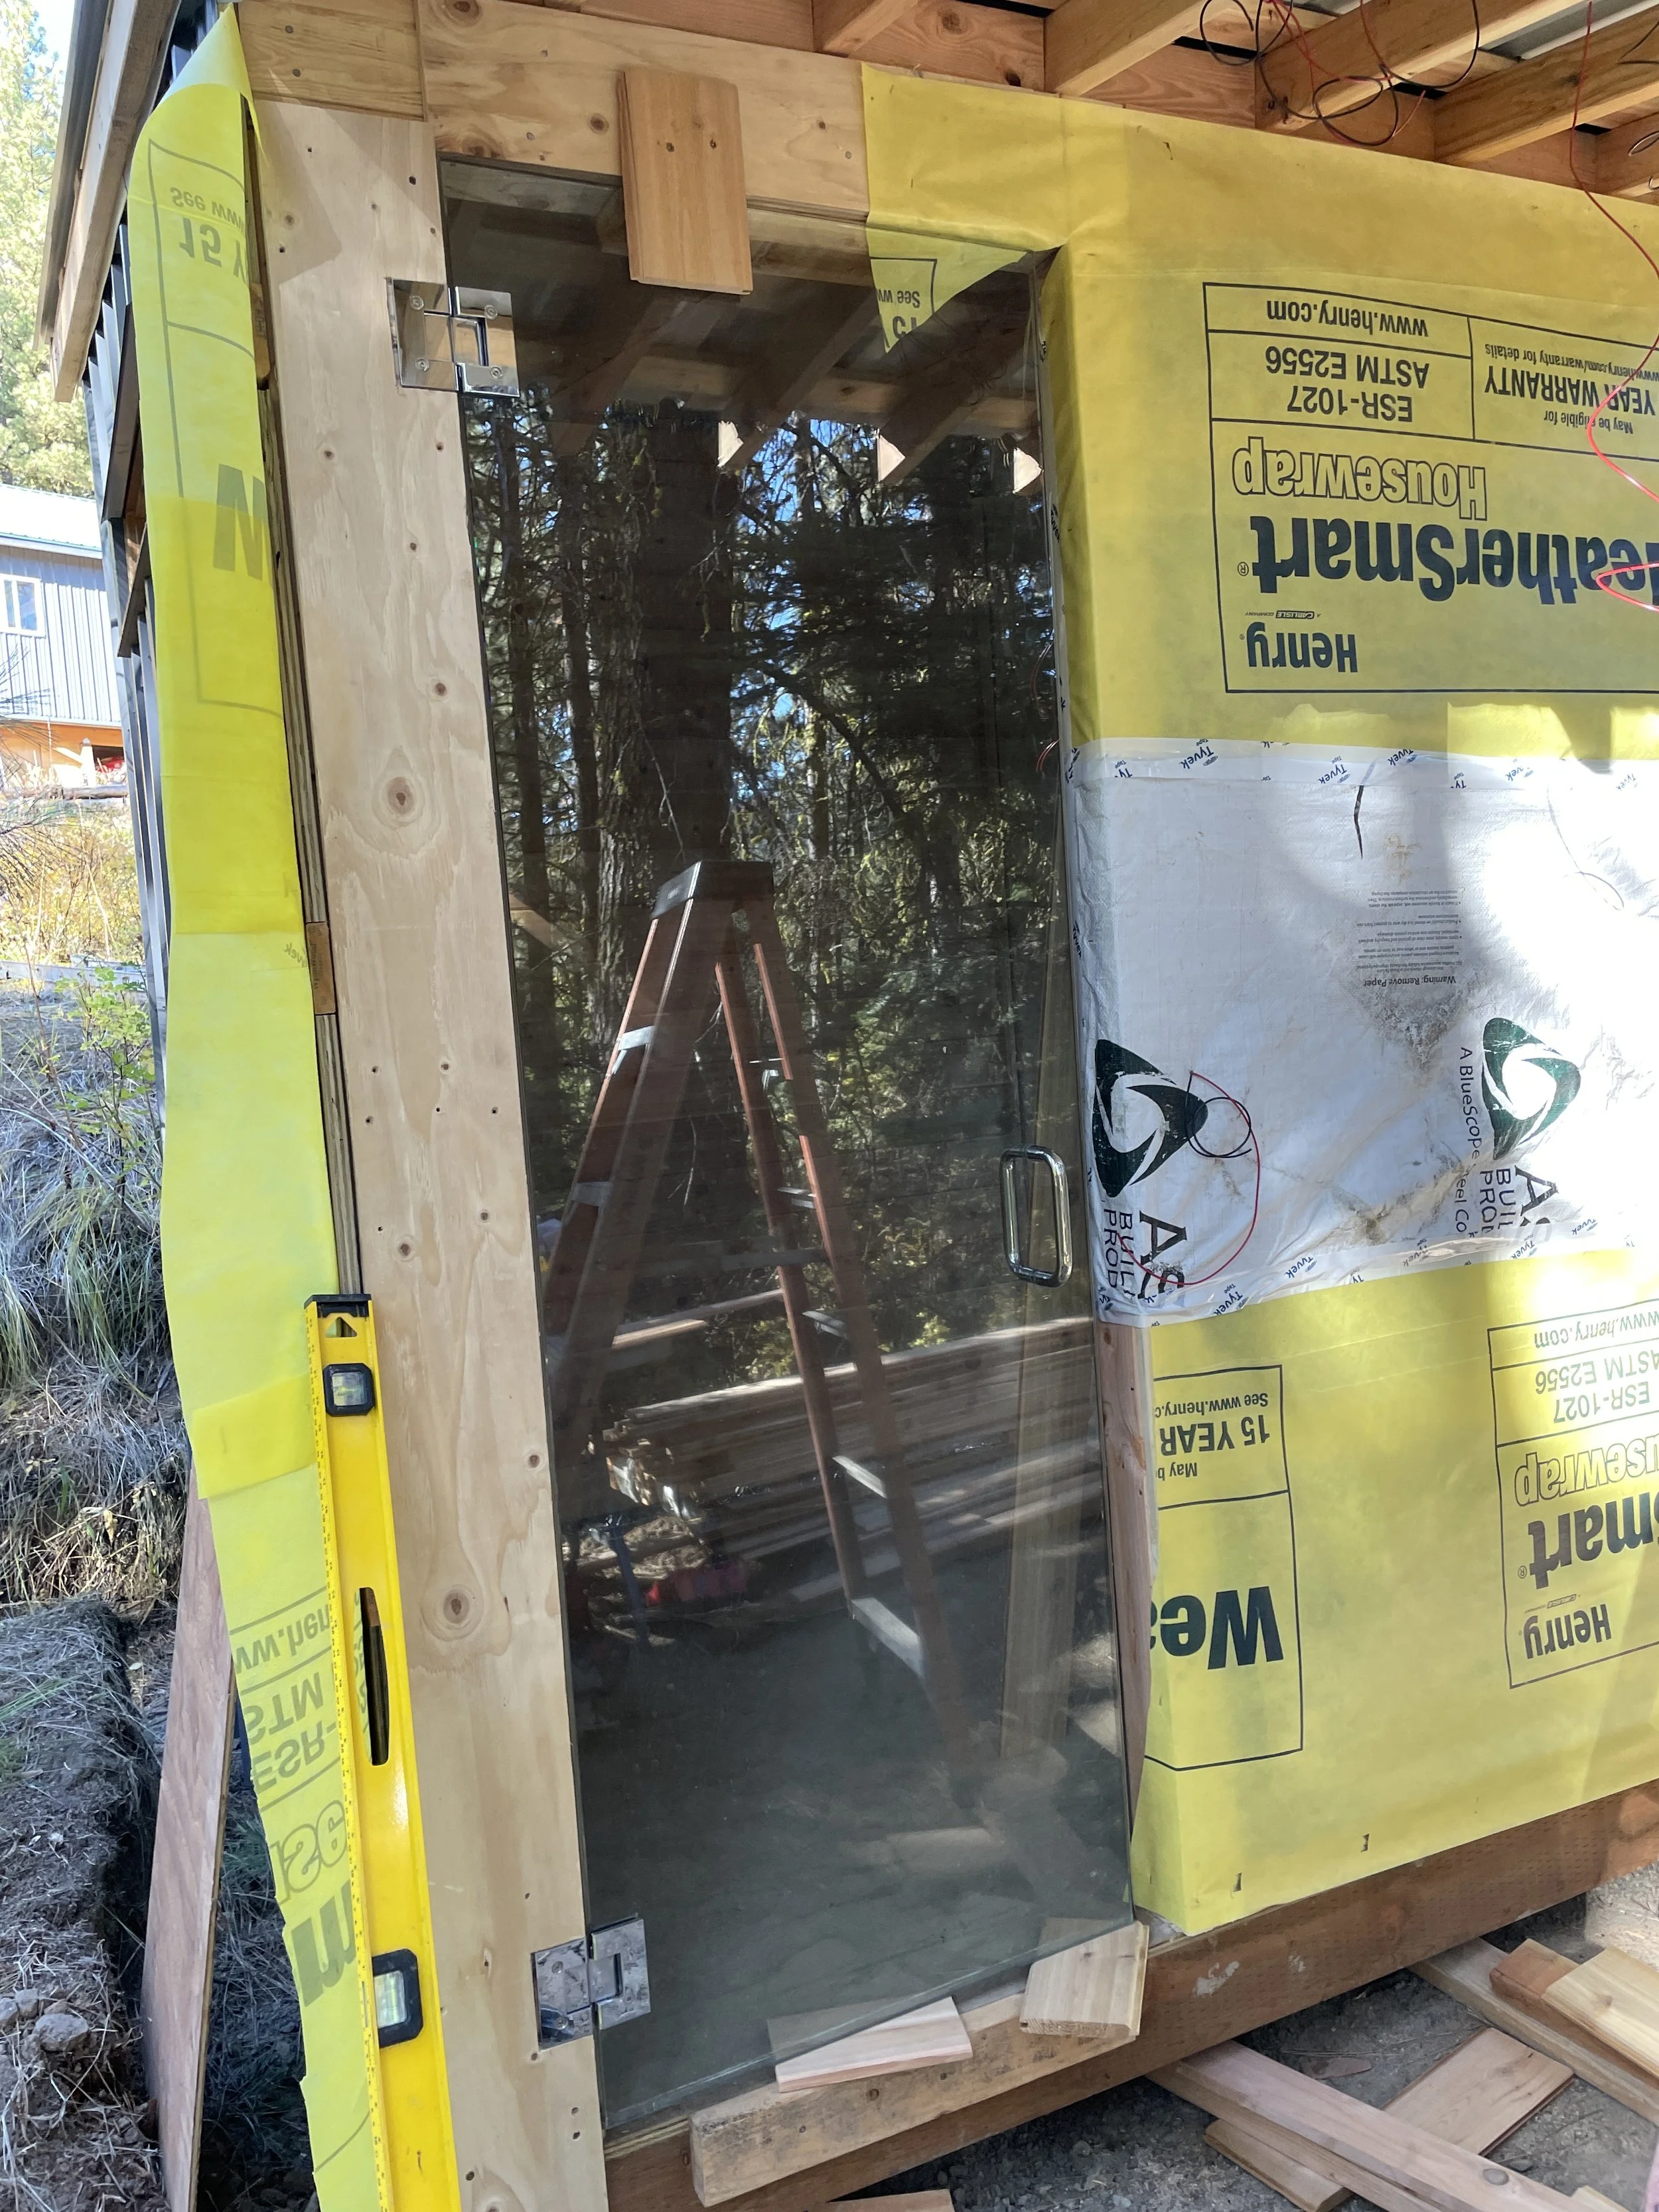
The door was an interesting challenge. Sourcing as many of the materials as cheaply as possible, it took some resourcefulness to get everything to play nicely. The particular door here was a take-off from someone’s steam shower, sold on Facebook Marketplace. It had the hinges included, which was great, but they were meant to clamp onto an adjacent piece of glass, rather than fasten to a wall or jamb. A very custom piece of plywood, carefully notched and cut, then painted, stands in for the glass. The trim details hide all of this quite nicely.
The window
Coming from a background in installing glass, windows are always a fun part. This “site-built” window was custom ordered to the opening size. All of the trims, sills, stops, and jambs were made from scraps. The sill is actually two pieces of cedar lap siding from the cabin project that were glued together. This makes for a nice slope for water to drain.

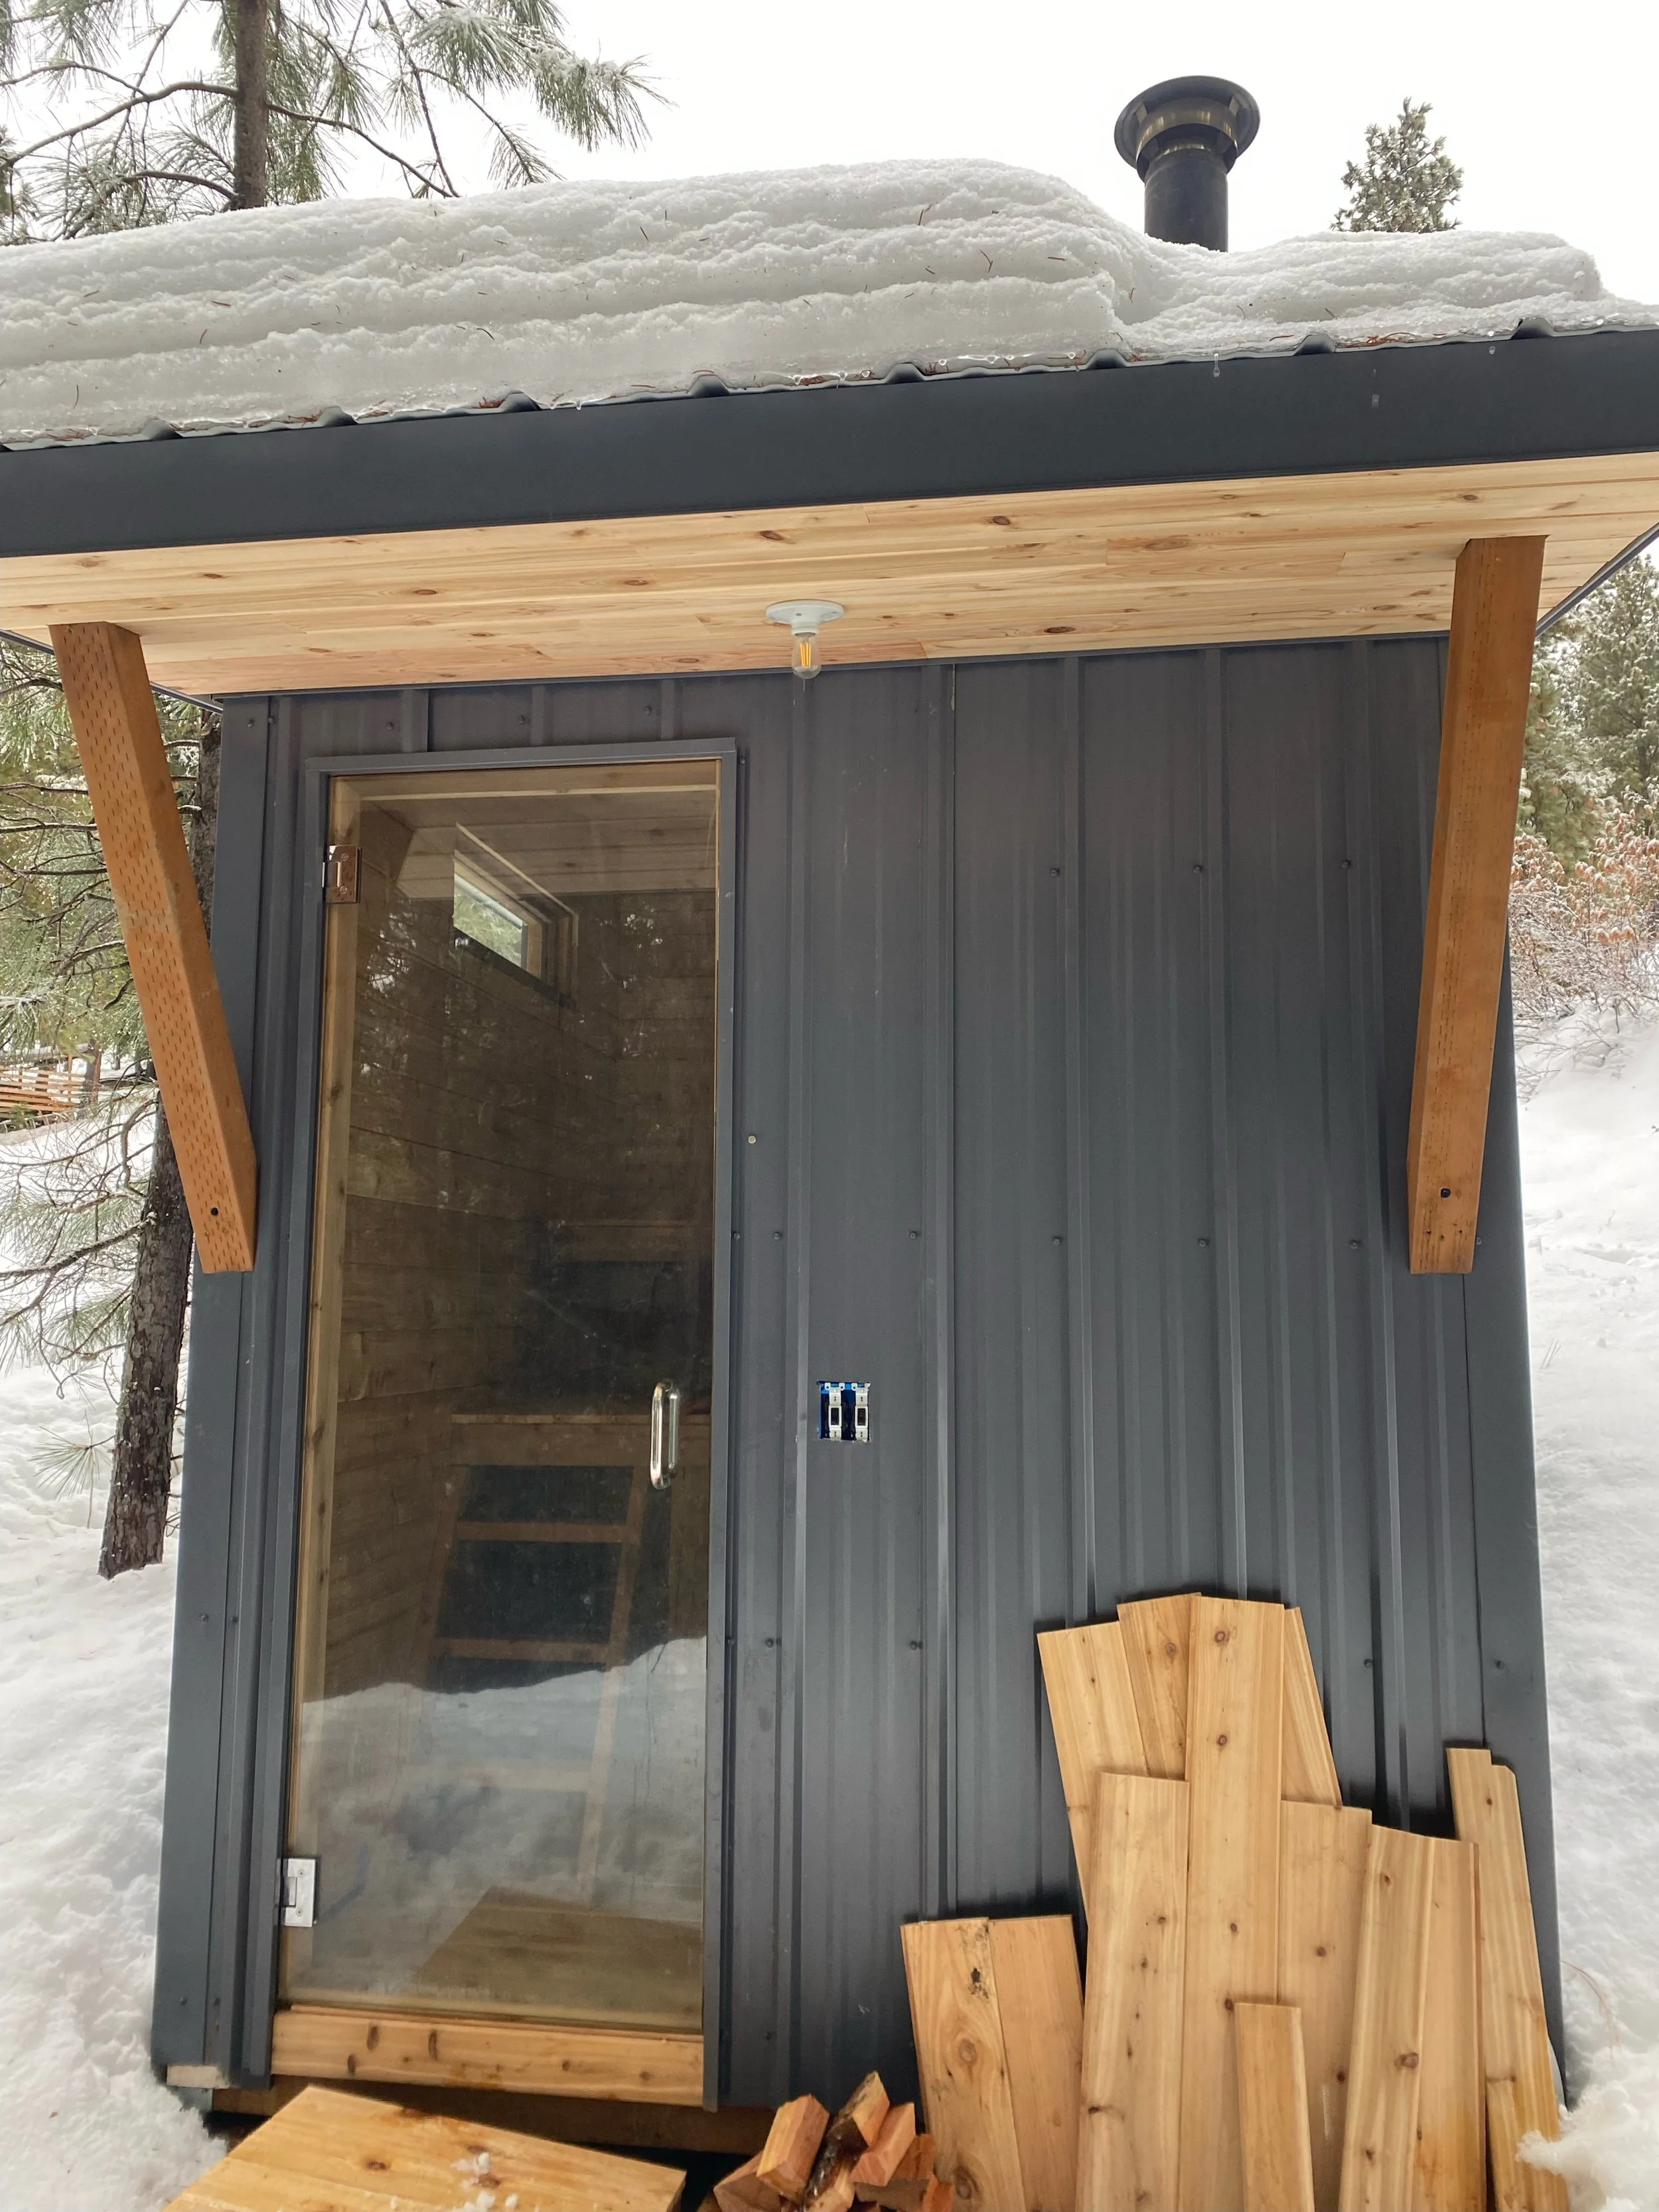
The lights
While the fire from the wood stove is often the only light left on while using the sauna, adding some lights was a nice touch. There are two lights, one outside and an LED strip along the back wall under the benches. With no electricity at the property, the lights are powered by a portable USB phone battery bank. All of the wiring is neatly routed in the walls and floor, as any building would be wired, with a small compartment for the battery to slide into and plug in. Some “custom” wiring was done to pull this off.
Sourcing materials
Aside from the window and door, materials came from all over, helping keep costs down. The thrill of the chase here may outweigh the true savings, but it’s all part of the process Several different lumber yard and backyard purveyors from across the Puget Sound were visited, including Martz Wholesale Lumber for the T&G, Mill Outlet Lumber in Tacoma for the decking, a great stop in Burien for the rough cut cedar for the outdoor shower, and some cedar scraps from a local sauna builder.
Tile can be a huge expense, but a nice find at Ballard Reuse and an even deeper discount from Always B closeouts in Bellingham really helped out. A good amount of scrap came from the cabin on the property. The rest of the new purchases came from the local lumber yard near the property and Home Depot.
The first “final” iteration and winter
The mountainous location means that the property is only accessible via snowmobile in the winter, with the first storm that closes the road coming rather unpredictably sometime between Halloween and Christmas. Waiting for shipping meant that the stove had to be towed in behind the snowmobiles on the first winter trip, and installed in the snow. This was a successful trip, and the sauna was now fully functional, an amazing winter addition.
Over the winter, the snow piled quite high, and the combination of hot sauna, drips from the roof, bare (hot) feet, also meant quite a bit of ice. By the spring, the door couldn’t open all the way, and you had to carefully climb down the snow/ice berm to get in. And while snow “showers” were easy in winter, a space was needed to shower year-round. So, this led to the design updates of the next spring.
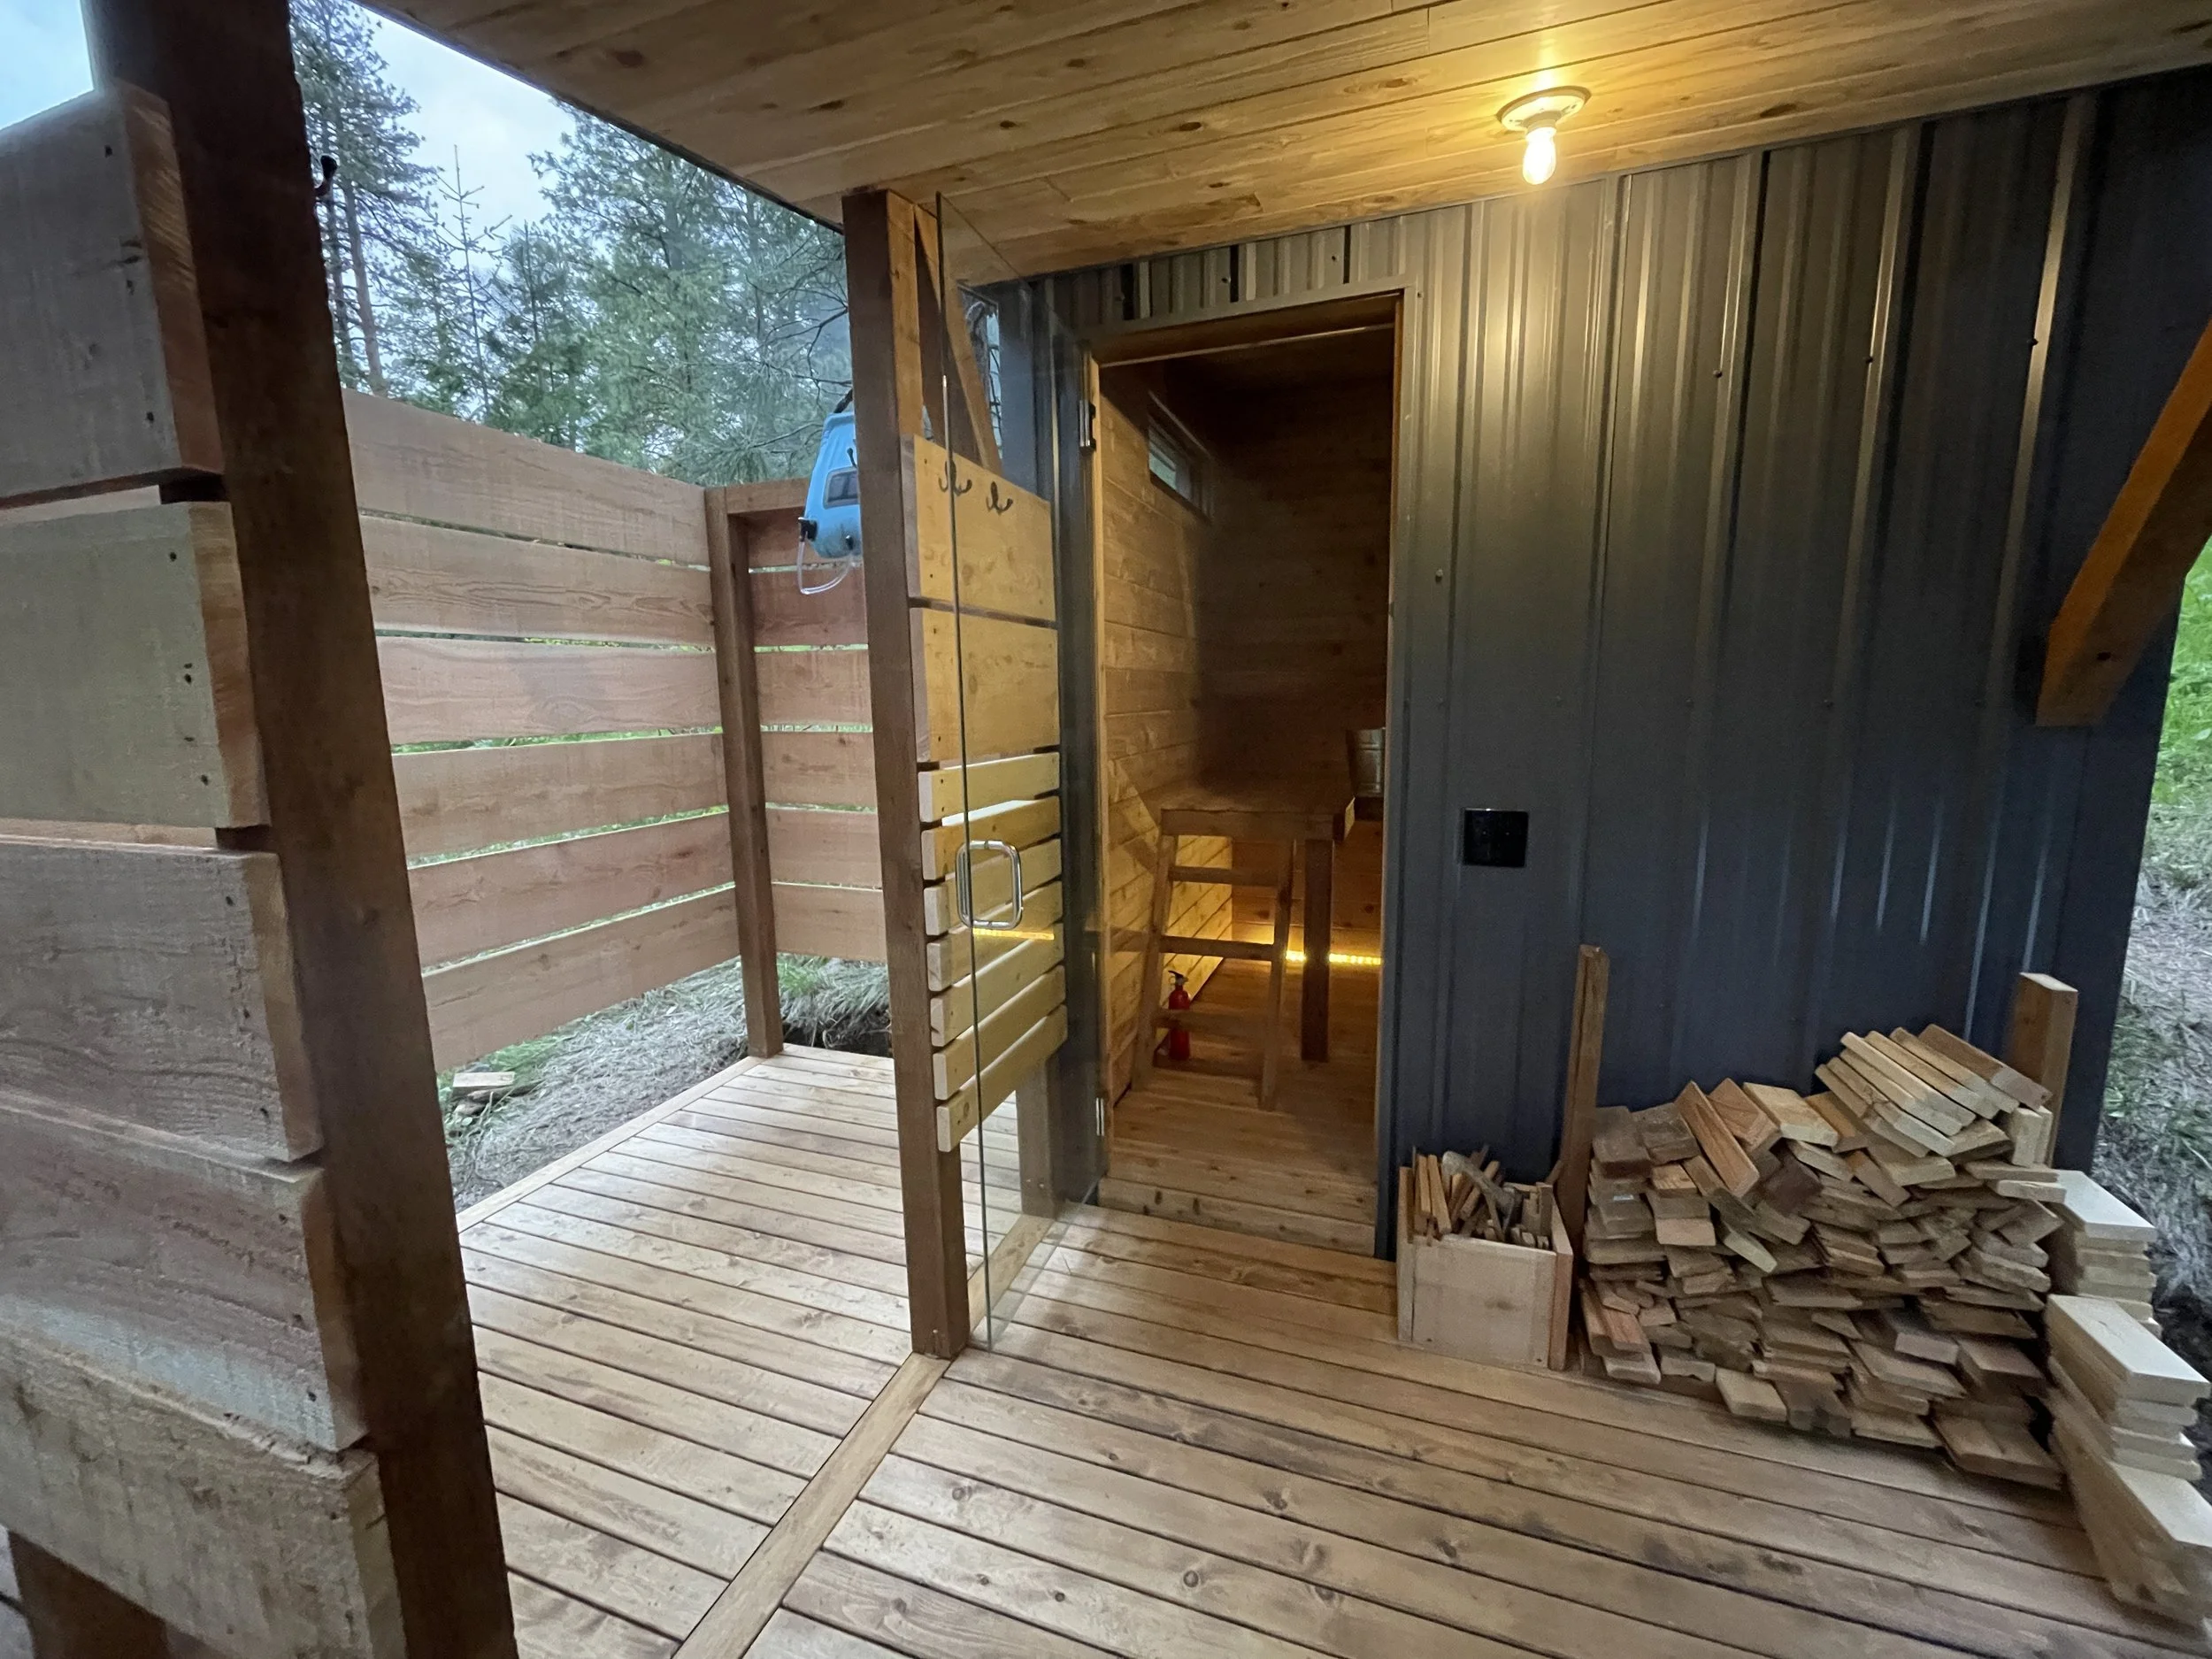
Turning the sauna into the spa: adding deck and outdoor shower
The following summer, the roof was extended to push the threat of snow and ice farther back from the door, making a bigger “landing.” This new space was then pushed outward to make room for a shower. For now, this is a camping bag shower, but in the future, a proper shower with a propane hot water heater may be added.

The result
This is one awesome sauna! The temps are great, the benches are high, and the setting is unreal. The addition of the outdoor shower is a total game-changer for the off-grid living up at the property. Now, you can sauna, shower, and go to bed nice and clean - quite the departure from dusty and dirty nights spend there. Overall, the build turned out great, it’s hard to think of anything to improve in the next iteration, except for maybe adding a few inches, making it closer to 8’x8’ instead of 8’x7’. The clearances needed from the wood stove take up a lot of room.